How to Repair a Mixing Valve: A Complete Guide to Mixing Valve Repair

Mixing valves play a crucial role in maintaining water temperature stability in plumbing systems, especially in homes and commercial buildings. When these valves fail or malfunction, it can lead to problems such as scalding hot water, freezing cold showers, or inconsistent temperature flow. This article provides a detailed guide on mixing valve repair, its importance, signs of damage, steps to fix it, and when to call a professional.
What Is a Mixing Valve?
A mixing valve, also known as a thermostatic mixing valve (TMV), is a device that blends hot and cold water to deliver water at a safe and consistent temperature. It’s typically found in showers, sinks, water heaters, and sometimes in underfloor heating systems. The valve ensures that the water temperature remains constant regardless of pressure changes in the system.
Types of Mixing Valves
- Thermostatic Mixing Valve (TMV): Automatically regulates temperature.
- Manual Mixing Valve: Requires manual adjustment.
- Pressure Balancing Valve: Maintains temperature despite pressure fluctuations in pipes.
Why Mixing Valve Repair Is Important
A faulty mixing valve can be more than just an inconvenience—it can be dangerous. Scalding injuries can occur if hot water is not properly regulated. On the other hand, insufficient hot water can result in discomfort or even health issues due to ineffective sanitation, especially in commercial or healthcare environments.
Furthermore, leaking or malfunctioning mixing valves can lead to increased utility bills and water wastage. Regular inspection and prompt mixing valve repair help in extending the life of your plumbing system and ensuring safety and efficiency.
Common Signs Your Mixing Valve Needs Repair
Recognizing the symptoms of a damaged or malfunctioning mixing valve can save time and avoid costly damage. Here are some common warning signs:
Inconsistent Water Temperature
One of the most obvious signs of a failing mixing valve is fluctuating water temperatures. If the shower or faucet suddenly goes from hot to cold without reason, the mixing valve might be worn or clogged.
No Hot Water
If you’re only getting cold or lukewarm water, the hot side of the mixing valve might be blocked or the thermostat inside the valve may have failed.
Leaks Around the Valve
Water leaks around the mixing valve body indicate loose connections, worn-out seals, or internal damage.
Strange Noises
A noisy valve might suggest a pressure imbalance or debris lodged inside the valve. Any unusual whistling or knocking sounds need to be checked immediately.
Reduced Water Pressure
If water pressure is lower than normal at specific outlets, especially those connected to the valve, sediment build-up or an internal malfunction may be restricting water flow.
Tools and Materials Needed for Mixing Valve Repair
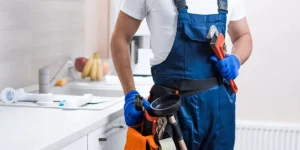
Before starting the repair process, gather the following tools and materials:
- Adjustable wrench
- Screwdriver
- Replacement parts or new mixing valve cartridge
- Plumber’s tape
- Bucket or towel
- Descaling solution (if needed)
- Flashlight
How to Perform Mixing Valve Repair
Follow these step-by-step instructions for basic mixing valve repair. For more complex issues or commercial systems, it is advisable to consult a licensed plumber.
Step 1: Turn Off the Water Supply
Locate the main water valve or the isolation valve near the faulty fixture and shut it off to prevent water flow during the repair. Turn on the faucet to drain any remaining water.
Step 2: Remove the Valve Cover
Depending on the design, you may need to unscrew a handle or decorative cover to access the mixing valve. Use a screwdriver and gently remove the faceplate to reveal the valve body.
Step 3: Inspect the Valve Components
Check the condition of the valve. Look for corrosion, mineral build-up, or broken parts. If the cartridge appears stuck or rusted, you may need to use a descaling solution to loosen it.
Step 4: Replace the Cartridge or Washer
If the cartridge is damaged, remove it using pliers or the special tool provided by the manufacturer. Insert the new cartridge, ensuring it’s properly aligned. If your valve uses washers or O-rings, replace them as needed.
Step 5: Reassemble the Valve
Once the internal parts have been repaired or replaced, carefully reassemble the valve components. Use plumber’s tape to ensure watertight seals on threaded connections.
Step 6: Turn On Water and Test
Restore the water supply and slowly turn on the faucet. Check for leaks and verify that the water temperature is stable and consistent. Monitor the valve operation over a few uses to confirm the problem is resolved.
Preventive Maintenance Tips
To avoid frequent mixing valve repair, consider the following maintenance practices:
Regular Cleaning
Flush the valve system every few months to prevent sediment and scale buildup. This is especially important in areas with hard water.
Check Temperature Settings
Some mixing valves allow temperature adjustments. Ensure the settings are within safe and efficient ranges, typically between 100°F and 120°F (37°C to 49°C).
Annual Inspections
Schedule an annual inspection of your plumbing system, especially if your home is older or you rely heavily on hot water. Early detection can prevent major issues.
When to Call a Professional
While some mixing valve repairs are simple enough for DIYers, complex issues require professional expertise. Contact a plumber if:
- You notice persistent temperature fluctuations even after repairs.
- The valve is located in a difficult-to-reach area.
- The system involves commercial or multi-fixture plumbing.
- You are unsure about the valve type or proper repair method.
A licensed plumber will have the tools and experience to diagnose the issue correctly and complete the repair efficiently, reducing the risk of damage.
Cost of Mixing Valve Repair
The cost of mixing valve repair can vary based on the type of valve, accessibility, and labor charges. On average:
- DIY cartridge replacement: $20 to $60
- Professional service: $100 to $300
- Full valve replacement (including labor): $150 to $500+
Costs can be higher for thermostatic valves or systems in commercial settings.
Conclusion
Mixing valves are vital components of a safe and functional plumbing system. When they malfunction, they can lead to water temperature issues, discomfort, or even injuries. Understanding the basics of mixing valve repair—from identifying symptoms to performing basic fixes—can save time, money, and hassle. Regular maintenance and timely intervention ensure your water temperature remains consistent and your plumbing system runs smoothly. If the problem is beyond your skill level, don’t hesitate to call a plumbing professional for help.
